


Categories
Workwear Logo Placement Guide 2026: Where Should Your Logo Go?
Every branded uniform starts with the same question: where exactly should the logo go?
Quick Reference: Logo Placement at a Glance
| Placement | Best Garments | Best Method | Visibility |
| Left Chest | Polos, T-Shirts, Jackets | Embroidery | Medium |
| Big Back | Hi-Vis, Hoodies, Sweatshirts | DTF Printing/Screen Printing | High |
| Sleeve | Long-Sleeve Tops, Softshells | Embroidery or Print | Medium |
| Nape of Neck | Premium Polos, Executive Jackets | Embroidery | Low |
| Leg | Cargo Trousers, Shorts | Embroidery or Print | Medium |
It sounds simple, but placement affects everything, how visible your brand is from across a room, how professional your team looks up close, and whether the logo lasts through hundreds of washes. After branding over 11,000 garments a day at our Dunstable factory for over 26 years, we’ve seen what works and what doesn’t across every industry and garment type.
This 2026 guide covers the five main logo positions, which garments suit each one, how to choose the right branding method for each placement, and what it typically costs. Whether you’re ordering your first load of branded polo shirts or rolling out uniforms across multiple sites, this will help you get it right first time.
Why Logo Placement Matters
Choosing the right position for your logo isn’t just about how it looks, it’s a practical choice with consequences that could affect how your brand is perceived and how long the branding lasts.
- Brand Recognition: A logo positioned at eye level on the left chest is seen during every handshake, every customer interaction, and every meeting. A large back print catches attention from a distance on a building site or at an event. Each position serves a different purpose, and many businesses use two or three positions together for maximum coverage.
- Professionalism & Consistency: Standardised placement and size for your logo creates a cohesive, uniform look across different garment types.
- Durability: Avoiding seams, pockets, or high-wear areas ensures the logo doesn’t peel or distort over time, keeping your branding looking sharp for longer.
The 5 Main Logo Positions Explained
1. The Classic Left Chest (The Industry Standard)
The left chest is the most popular choice for logo workwear, providing a polished, professional look across your team. It sit’s at a natural eye level during face-to-face interactions, making it one of the first things a customer will notice.
- Best Garments: Polo shirts, t-shirts, jackets, and fleeces.
- Recommended Method: Embroidery. The left chest is a small area, and embroidery delivers a premium, textured finish that looks sharp on structured fabrics like piqué polo shirts and fleeces. It also handles frequent washing exceptionally well and will typically outlast the garment itself.
- Pro Tip: If you are adding staff names, the standard practice is to put the company logo on the left and the individual’s name on the right chest.
2. The Large Back (Maximum Impact)
When your team is out in the field, their backs are often what the public sees most. Think of a plumber under a sink or a technician on a ladder, in all of these situations, the back of the garment is your most visible advertising space.
- Best Garment: Hi-vis vests, sweatshirts, and hoodies.
- Recommended Method: DTF or Screen Printing. These methods handle the larger print area efficiently and can reproduce fine details, gradients, and photographic elements that embroidery cannot.
- Pro Tip: Ensure the logo is placed high enough so it isn’t tucked into trousers but low enough not to be covered by a hood. But don’t worry, our team will help you with the best logo placements. Embroidery does also work on the back but the stitch count can be high which increases costs.
3. The Sleeve (The Modern Touch)
Sleeve branding has seen a massive rise in popularity in recent years. It adds a contemporary, sporty feel to a uniform and provides visibility from angles that chest and back logos miss entirely.
- Best Garments: Long-sleeve t-shirts, hoodies, and softshell jackets.
- Recommended Method: Embroidery for smaller logos (particularly on the upper arm), or DTF print for larger sleeve designs.
- Pro Tip: Use the sleeve for secondary information, such as a “Quality Certified” badge.
4. The Nape of the Neck (Subtle and Premium)
The nape position sits on the back of the garment, just below the collar. It’s a discreet placement that communicates quality and attention to detail.
- Best Garments Premium polos and executive jackets.
- Recommended Method: Embroidery. The nape area is small and sits on a structured part of the garment, making embroidery the natural choice.
5. Leg Branding (Stand Out in the Trades)
Workwear branding isn’t limited to tops. Adding your logo to work trousers or shorts is an effective way to differentiate your team, particularly in trade and construction environments where heavy-duty legwear is standard.
- Best Garments: Cargo trousers and work shorts.
- Recommended Method: Embroidery or DTF print, depending on the fabric and position.
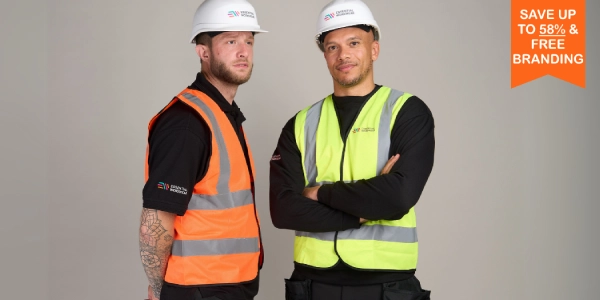
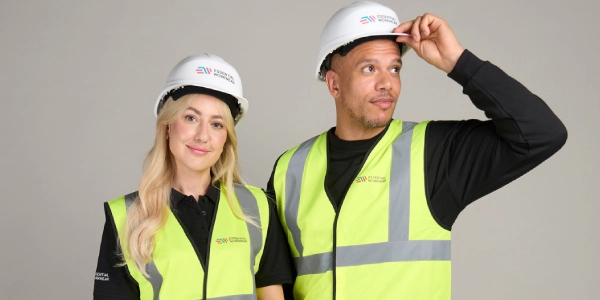
Special Consideration: Hi-Vis Logo Placement
When it comes to logo placement workwear for safety gear, there are stricter rules. You must ensure that your logo does not cover the reflective “retro-reflective” tape.
If a logo is too large and covers the silver tape, the garment may no longer meet EN ISO 20471 safety standards. At Essential Workwear, we always recommend placing logos in the gaps between the tape, usually on the upper chest (above the chest-level tape) or on the upper back (between the shoulder tape and the chest tape). Our team will always check that your chosen placement maintains full compliance before production.
Branding Method for Hi-Vis: Print is generally recommended over embroidery for hi-vis garments, as the stitching process from embroidery can compromise the integrity of the fluorescent fabric in some cases. DTF and screen printing both work well on hi-vis materials.
Want to understand more about Hi-Vis safety standards? Read our blog ‘EN ISO 20471 High-Visibility Clothing Standards Explained‘.
Embroidery vs. Screen Print vs DTF: Which Fits Where?
Your choice of logo position often determines the best branding method. Here’s how they compare:
| Embroidery | Screen Printing | DTF Printing | |
| Best Positions: | Left/Right Chest, Sleeve, Nape | Full Back/Full Front, Hi-Vis Garments | Any Position, Especially detailed logos |
| Durability: | Excellent – Outlasts the Garment | Very Good – 50+ Washes | Very Good – 50+ Washes |
| Detail Level: | Good for Simpler Logos Up To 14 Colours | Good For Bold, Solid Designs | Excellent — Handles Gradients & Fine Detail |
| Best for Quantities: | Any Quantities (Over 6 pieces to avoid small order fee) | 50+ Garments (Most cost-effective at scale) | 1–50 Garments (Ideal for small runs) |
| Not Suitable For: | Very Large Designs (200mm+), photographic logos | Small Runs Under 50, highly detailed/gradient designs | N/A — Works on most garments and sizes |
For a deeper comparison, read our full guide: Embroidery vs Printing vs DTF
How Many Logo Positions Should You Use?
Most businesses start with a single position — usually the left chest — and this is perfectly effective for a clean, professional look. However, combining two or three positions significantly increases your brand’s visibility throughout the day.
The most popular combinations we produce are:
- Left chest + full back — The classic combination. Professional up close, highly visible from behind. This is the most common setup for trades, construction, and field service businesses.
- Left chest + sleeve — A more modern look that provides front and side visibility without a large back print. Popular with hospitality, retail, and corporate teams.
- Left chest + nape — The premium, understated option. Ideal for executive workwear, corporate events, or client-facing roles where subtlety matters.
- Left chest + full back + sleeve — Maximum coverage for maximum visibility. Common for events teams, large-scale outdoor operations, and businesses where staff need to be identifiable from any angle.
Adding a second logo position does add to the cost. As a rough guide, a single embroidered position starts from around £3–6 per garment (depending on quantity and logo complexity), with each additional position adding a similar amount. Printed positions for back logos are typically priced per design rather than per garment, making them more cost-effective at higher quantities.
See our full pricing breakdown in our guide to branded workwear costs.
Logo Sizing Guide
Getting the size right matters just as much as getting the position right. A logo that’s too large looks cheap; one that’s too small is invisible.
| Position | Recommended Width | Recommended Height | Notes |
| Left/Right Chest | 80-100mm | 40-80mm | Should sit comfortably above the pocket line |
| Full Back | 250mm-300mm | 200-280mm | Place high enough to avoid being tucked in & low enough to not be covered by a hood |
| Sleeve (Upper Arm) | 60-80mm | 60-80mm | Keep compact to avoid wrapping around the arm |
| Sleeve (Forearm) | 80-120mm | 40-60mm | Works best as a horizontal strip |
| Nape of Neck | 60-80mm | 20-40mm | Keep proportional to the collar width |
| Leg (Thigh/Pocket) | 60-100mm | 40-80mm | Scale to the pocket or panel size |
These are guidelines based on standard adult garment sizes. For smaller sizes (XS–S), scaling down by 10–15% usually looks more balanced. Our artwork team will always provide a scaled proof on your chosen garment before you approve production.
Frequently Asked Questions: Workwear Logo Placement
Everything you need to know about placing, sizing and branding logos on workwear, from the classic left chest to hi-vis safety rules.
Where should a logo go on workwear? – The most popular and professional position is the left chest. It sits at natural eye level during face-to-face interactions and suits polo shirts, t-shirts, jackets, and fleeces. For maximum visibility on site, a large back print is the best option. Many businesses use two or three placements together, for example, left chest plus large back for full coverage.
What is the standard logo size for workwear? – For left chest embroidery, logos are typically kept within a 100mm x 100mm area. For a large back print, the design can extend up to 350mm wide. Embroidery is not recommended for designs larger than 200mm, as the stitch count becomes high, DTF or screen printing is a better choice for oversized logos.
Can you put a logo on hi-vis workwear? – Yes, but there are important safety rules to follow. Your logo must not cover the retro-reflective (silver) tape, as this could cause the garment to fail EN ISO 20471 safety standards. The safest placements are the upper chest (above the chest-level tape) or the upper back (between the shoulder and chest tape). Print methods such as DTF or screen printing are recommended over embroidery for hi-vis garments, as stitching can compromise the fluorescent fabric.
What is the best branding method for workwear logos? – It depends on your logo and garment. Embroidery is the premium choice for chest, sleeve, and nape placements as it outlasts the garment itself and looks sharp on structured fabrics. DTF printing is ideal for detailed logos, gradients, and small runs of 1–50 garments. Screen printing is most cost-effective for bold, solid designs on orders of 50 or more garments.
How do you add a name badge alongside a company logo on workwear? – The standard practice is to place the company logo on the left chest and the individual’s name on the right chest. This keeps the branding consistent across your team while personalising each garment.
Can you brand work trousers and shorts with a logo? – Yes. Leg branding is particularly popular in trade and construction environments. Cargo trousers and work shorts can be branded using embroidery or DTF print, depending on the fabric and exact placement on the leg.
What is sleeve branding on workwear? – Sleeve branding places a logo on the upper or lower arm of a garment. It has grown in popularity because it adds a contemporary, sporty feel and provides visibility from side-on angles that chest and back logos miss. It works best on long-sleeve t-shirts, hoodies, and softshell jackets. Embroidery suits smaller sleeve logos; DTF print works better for larger sleeve designs.
What is nape of neck branding on workwear? – The nape position sits on the back of the garment, just below the collar. It is a subtle, premium placement used on executive jackets and high-end polo shirts to communicate quality and attention to detail. Embroidery is the recommended method for this position due to the small, structured area.
How many logo positions can you have on a single workwear garment? – There is no set limit, and many businesses combine two or three placements to maximise brand visibility. A common combination is left chest plus large back, with an optional sleeve badge for secondary information such as a certification mark or department name.
How durable is workwear logo branding? – Embroidery is the most durable option and will typically outlast the garment itself. Screen printing and DTF printing both hold up well beyond 50 washes when applied correctly. To maximise longevity, logos should be positioned away from seams, pocket openings, and high-wear areas that cause peeling or distortion over time.
If you have any other specific questions about logo placement and branding your workwear, please contact our sales team on sales@essentialworkwear.com.
Get Your Branded Workwear Right with Essential Workwear
Choosing the right logo placement workwear can be the difference between a uniform that looks “thrown together” and one that looks like a world-class brand.
At Essential Workwear, we’ve helped thousands of businesses find the perfect balance between style, durability, and brand visibility. Whether you need help with embroidery on the chest or a bold print on the back, our team is here to guide you.
Ready to upgrade your team’s look? Browse our range of customisable workwear or contact us today for a bespoke quote.