

Categories
Embroidery Stitch Types Explained: What They Are and Why They Matter
When you hand over your logo for embroidery, more goes into the finished result than you might expect. Before a single stitch hits the fabric, our team decides which stitch types to use for each part of your design and those choices have a direct impact on how your logo looks, how long it lasts, and how much it costs. Text needs clean, sharp edges, large solid areas need proper coverage, and fine details need precision without unnecessary thread bulk. Getting that balance right is part of what separates quality embroidery from cheap embroidery.
In this guide, we’ll walk through the main embroidery stitch types we use here at Essential Workwear, what each one is best suited for, and how they affect your final quote:
- Satin stitch — smooth, sharp-edged stitching for text, borders and outlines.
- Fill (tatami) stitch — solid, stable coverage for larger areas of a design.
- Running stitch — lightweight, single-line stitching for fine detail and underlay.
- Bean stitch — a reinforced running stitch for bolder, more visible outlines.
- 3D puff embroidery — foam-backed satin for a raised, premium finish.
- Appliqué — fabric panels stitched on to cut the stitch count on large designs.
- Underlay stitches — the hidden foundation layer that stabilises every logo.
If you’d like to understand how stitch count drives overall pricing first, take a look at our guide to embroidery stitch count and pricing explained.
The Main Embroidery Stitch Types We Use
1. Satin Stitch
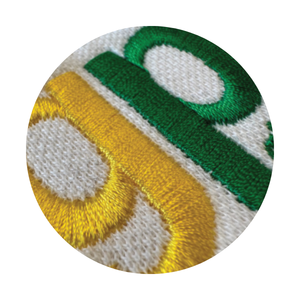
Satin stitch uses long, parallel stitches laid closely together to create smooth, slightly raised areas of embroidery with a subtle sheen. If you’ve ever looked closely at a professionally embroidered polo shirt and noticed how clean and defined the lettering is, that’s almost certainly satin stitch at work.
We use it most often for text, borders, outlines, and bold logo elements where sharp edges and clean definition matter. It’s also one of the more efficient stitch types to run, satin stitches generally move faster through the machine than dense fill stitches, which helps keep costs down on smaller logo elements.
Satin stitch works best on narrower elements. For wider filled areas, we’d typically switch to fill stitch to maintain quality and avoid stitches becoming too long, which can affect durability.
2. Fill (Tatami) Stitch
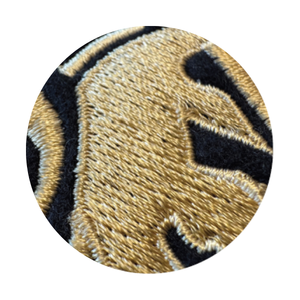
Fill stitch, sometimes referred to as tatami stitch, is what we use to cover larger solid areas of a design. Rather than long smooth lines, it uses rows of shorter stitches layered across the surface in patterns, creating solid coverage with good stability.
We can adjust the stitch direction, density, and angle depending on the fabric and the look you’re going for. Different angles and directions within the same design element can add subtle texture and visual depth, which is especially effective on more complex branded garments.
The trade-off is that fill stitch uses a high number of stitches across wide areas, which increases both the embroidery stitch count and the machine time required. For logos with large solid sections, this is where a significant portion of the cost comes from. Our full breakdown of embroidery stitch count and pricing covers this in more detail.
3. Running Stitch
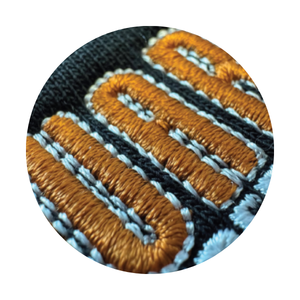
Running stitch is the simplest of the embroidery stitch types: a single line of stitches that follows a path through the design. It’s fast, lightweight, and uses minimal thread.
We use it for fine detail work, delicate outlines, and decorative elements where heavy thread coverage isn’t needed. It’s also used as part of underlay (more on that below) and for travel stitches that move the machine between sections of the design without adding visible coverage.
Because running stitch adds very little to the overall stitch count, it’s one of the most cost-efficient ways to include fine detail in a logo without significantly affecting the price.
4. Bean Stitch
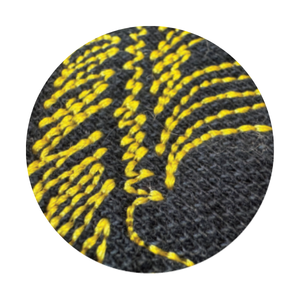
Bean stitch is essentially a reinforced version of running stitch. Instead of passing over a line just once, the machine goes over it multiple times, typically three passes, creating a thicker, bolder line without the need to switch to satin stitch.
It’s a useful option when you need stronger outlines or more visible definition but want to keep stitch counts more controlled. Bean stitch strikes a good balance between visual impact and efficiency, and it’s particularly effective for logos where crisp outlines are important but the overall design doesn’t warrant the full coverage of satin.
5. 3D Puff Embroidery
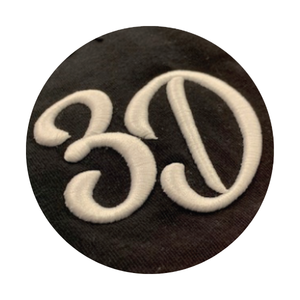
3D puff embroidery is one of the most striking finishes available, and it’s a particular favourite of ours for the right application. It’s also featured as one of the standout branded workwear trends for 2026, and it’s easy to see why. It works by placing a thin layer of foam underneath the satin stitching, which creates a raised, dimensional effect that lifts the logo off the surface of the garment.
It’s most commonly used on branded caps and bold logo lettering where depth and texture make a real visual impact. The result is unmistakably premium, it’s the kind of finish that genuinely elevates branded workwear from functional to impressive.
That said, puff embroidery does require specialist digitising and more careful machine handling throughout production. The foam needs to be precisely placed, and the stitching has to be set at the right density to hold the foam cleanly without gaps or splits. This additional complexity increases the embroidery pricing compared to standard flat embroidery, but for the right logo and garment, it’s well worth considering. Our guide to what file format works best for logo embroidery is a useful read before submitting artwork for puff digitising.
3D puff works best on bold, simple letterforms and clean shapes. Fine detail and thin lines don’t suit this technique, the foam can’t hold intricate edges cleanly. If you’re considering puff embroidery, our team can advise whether your artwork is a good candidate.
6. Appliqué
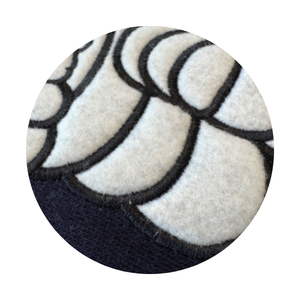
Appliqué takes a different approach to large filled areas entirely. Instead of stitching every part of the design directly into the garment, a separate piece of fabric is cut to shape and stitched onto the garment, then secured with embroidery around the edges.
The practical benefit is significant: appliqué dramatically reduces the stitch count on oversized designs. A large back logo that might require 40,000 or 50,000 stitches if fully embroidered could be completed with a fraction of that using appliqué, because the bulk of the coverage comes from the fabric panel rather than thread.
It’s commonly used for large back logos, varsity-style branding, and any design where scale would make full embroidery impractical or prohibitively expensive. For those situations, DTF printing is another strong alternative worth exploring, our comparison of embroidery vs printing vs DTF breaks down which method suits which type of design.
7. Underlay Stitches
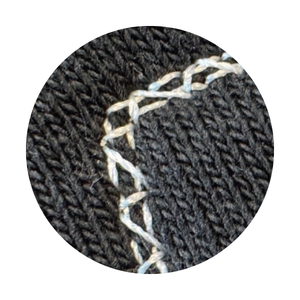
Underlay stitches are the unsung heroes of quality embroidery. They’re the hidden foundation layer placed beneath all the visible stitching, and they do a job that most people never see, but will certainly notice if they’re missing.
Their purpose is to stabilise the fabric before the top stitches are applied. This matters especially on softer materials like fleece, pique polo shirts, or knitwear, where the fabric can stretch or shift during embroidery. The fabric your workwear is made from has a significant bearing on how the underlay needs to be set up, it isn’t one-size-fits-all. Without proper underlay, the top stitches can sink into the fabric, pull unevenly, or create a puckered finish. With it, the logo sits cleanly on the surface with clear definition and consistent coverage.
Good underlay also significantly improves wash performance. Logos without it tend to shift, gap, or deteriorate much faster after repeated washing, which is a serious problem on workwear that gets laundered regularly.
Some suppliers reduce or skip underlay stitches to lower stitch counts and cut production time. It’s an easy saving to make on paper, but the impact on quality and longevity is real. At Essential Workwear, we always include proper underlay on every embroidered logo, because the goal is embroidery that outlasts the garment, not the other way around.
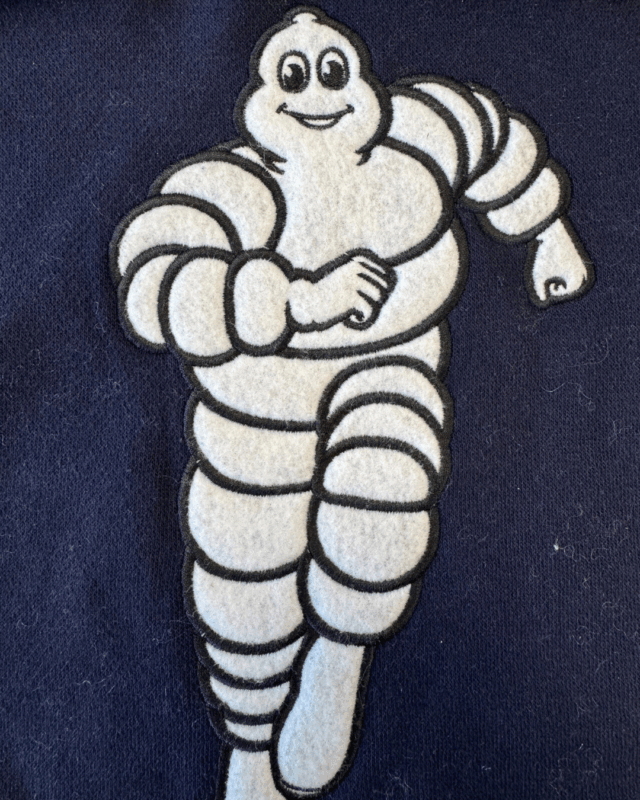
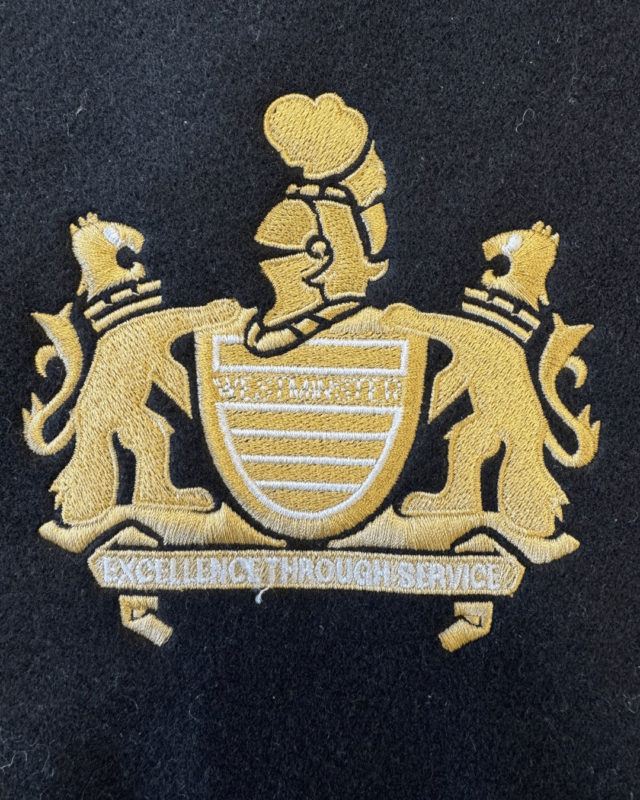
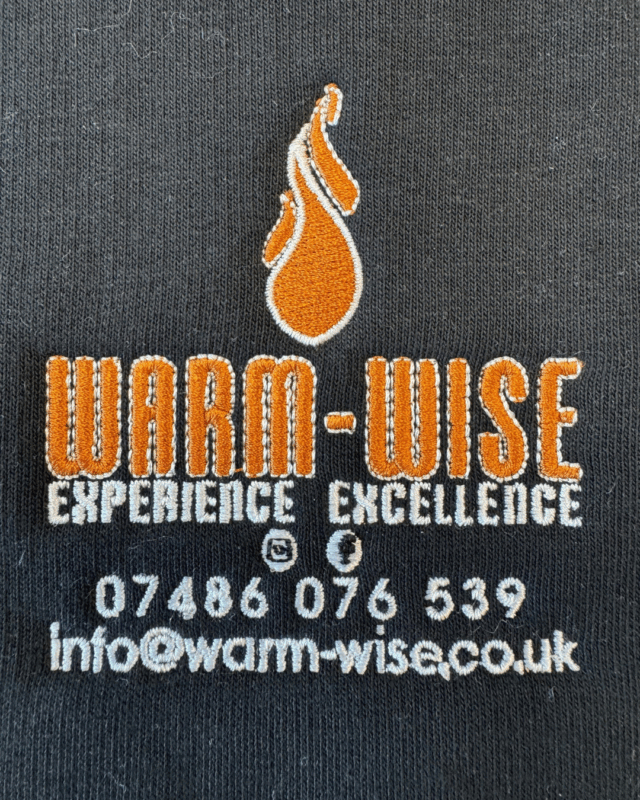
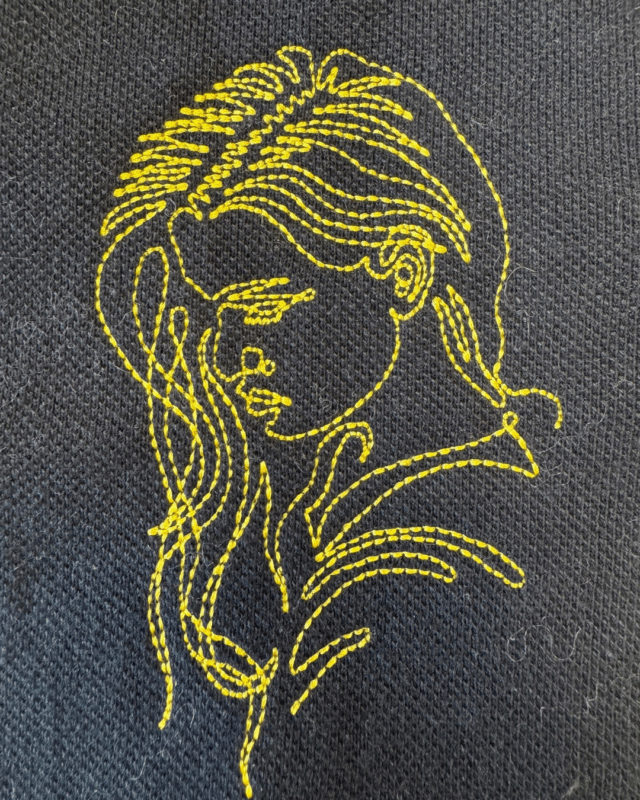
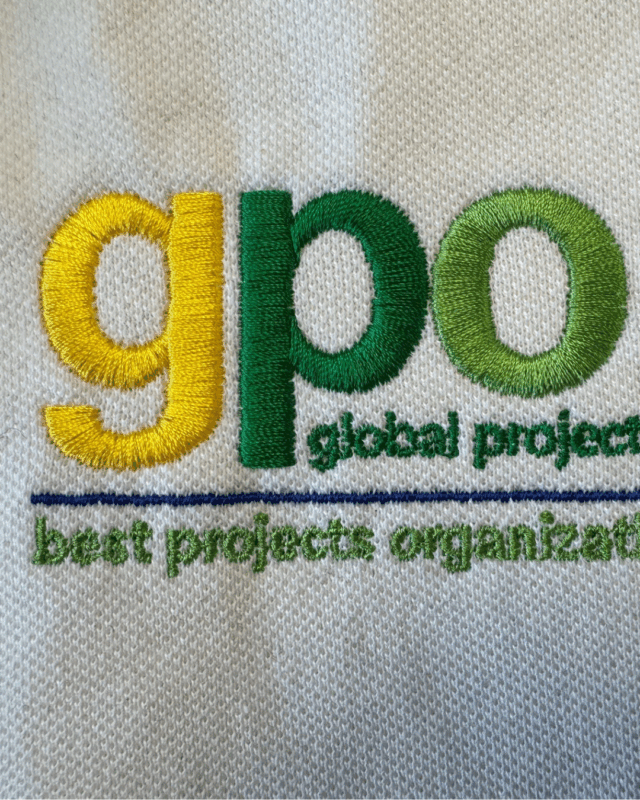
Here are some examples of different stitching techniques on our customers’ finished logos:
Quick Reference: Stitch Types at a Glance
Not sure which stitch type is right for your logo? Here’s a summary of how each one works and where it’s most commonly used.
| Stitch Type | Best Used For | Effect on Stitch Count | Key Benefit |
| Satin Stitch | Text, outlines, borders | Low to moderate | Sharp edges, clean finish |
| Fill (Tatami) | Large solid areas | High | Full coverage, durable |
| Running Stitch | Fine detail, lightweight elements | Very low | Fast, precise, minimal thread |
| Bean Stitch | Bold outlines, reinforced detail | Low to moderate | Strong lines without satin stitch |
| 3D Puff | Caps, bold lettering | Moderate | Dimensional, premium look |
| Appliqué | Large back logos, oversized designs | Very low | Dramatic stitch count reduction |
| Underlay | All embroidery (foundation layer) | Adds to total | Stability, durability, definition |
Why Stitch Type Matters
Most people focus on stitch count when comparing embroidery quotes and rightly so, because it’s one of the biggest pricing factors. But stitch type is just as important, and it’s often overlooked.
The type of stitch used for any given part of your logo affects three things: the visual result, the durability of the embroidery, and the machine time required. A well-digitised logo uses the right stitch type for each element, which means the finished product looks better, lasts longer, and is produced as efficiently as possible.
That’s why two logos with an identical stitch count can still look and perform very differently. It comes down to how they’ve been digitised and which stitch types have been assigned where. You can learn more about how we approach this as part of our logo application methods.
How Stitch Type Affects Your Quote
Understanding stitch types helps explain something that catches a lot of buyers off guard: why two quotes for the ‘same’ logo can look so different.
A supplier using low-density fill stitch, skipping underlay, or reducing satin coverage will produce a lower stitch count and therefore a lower quote. But the finished product will look different, feel different, and wear differently. Lower stitch density means the fabric shows through. Missing underlay means the logo shifts. Reduced satin coverage means edges lose definition over time.
When you’re comparing quotes, it’s always worth asking what stitch types and densities the supplier is using, not just the total stitch count. Our guide to embroidery stitch count and pricing explained covers exactly what to look for and our wider comparison of how embroidery compares to printing is useful if you’re still deciding on the right branding method for your garments.
At Essential Workwear, we’re always happy to talk through the digitising decisions behind your logo. If you’ve received a quote elsewhere and want to understand what you’re actually comparing, just get in touch.
Frequently Asked Questions
What is the most common embroidery stitch type for workwear logos?
Satin stitch and fill (tatami) stitch are the two most frequently used. Satin stitch handles text, outlines, and finer elements. Fill stitch covers larger solid areas. Most logos use a combination of both, along with running stitch for detail and underlay throughout. You can find more answers on our FAQs page.
Does the stitch type affect how long embroidery takes?
Yes. Fill stitch is the most time-intensive because it uses a high density of stitches across wide areas. Satin and running stitch are generally faster. This is one of the reasons why the stitch type breakdown in your digitised file has a direct impact on production time and pricing. Read more in our embroidery pricing guide.
Can I request a specific stitch type for my logo?
You can absolutely discuss your preferences with our team, and for certain finishes, like 3D puff, you can request it specifically. For the most part, though, stitch type decisions are made during digitising based on what works best for your artwork and the garment it’s going on. Supplying the right artwork file helps enormously, our guide on what file format works best for logo embroidery explains exactly what to send us.
Is 3D puff embroidery suitable for all garments?
Not quite. It works best on structured garments like caps and headwear, or on heavier fabrics where the foam can be supported properly. It’s less suited to lightweight polos or soft jersey fabrics, where the surface isn’t firm enough to hold the raised effect cleanly. Our team can advise on suitability based on your garment and artwork.
Why does underlay add to the stitch count if it’s not visible?
Because underlay stitches are still stitched by the machine, they’re just hidden beneath the top layer. Every needle movement counts toward the total stitch count, including the foundation layer. It’s a necessary part of quality embroidery, not a padding exercise. Suppliers who quote lower stitch counts are often simply skipping or reducing underlay, which affects the durability of the finished logo. See our full embroidery stitch count and pricing guide for more on this.
What if embroidery isn’t the right method for my design?
For very large or complex designs, DTF printing or a combination of methods may suit your logo better. Our guide to embroidery vs printing vs DTF walks through the trade-offs clearly, and our team is always happy to advise on the best approach for your specific brief.